Reconciliation Tab
Objective: Gain an understanding of how to navigate to the Reconciliation tab and how to generate a grouped Reconciliation report within the Accounting module.
To view the Reconciliation tab, select 'Accounting' from the Navigation Sidebar, and from the Navigation Dropdown, select either 'Fair Value' or 'Historical' ledger.

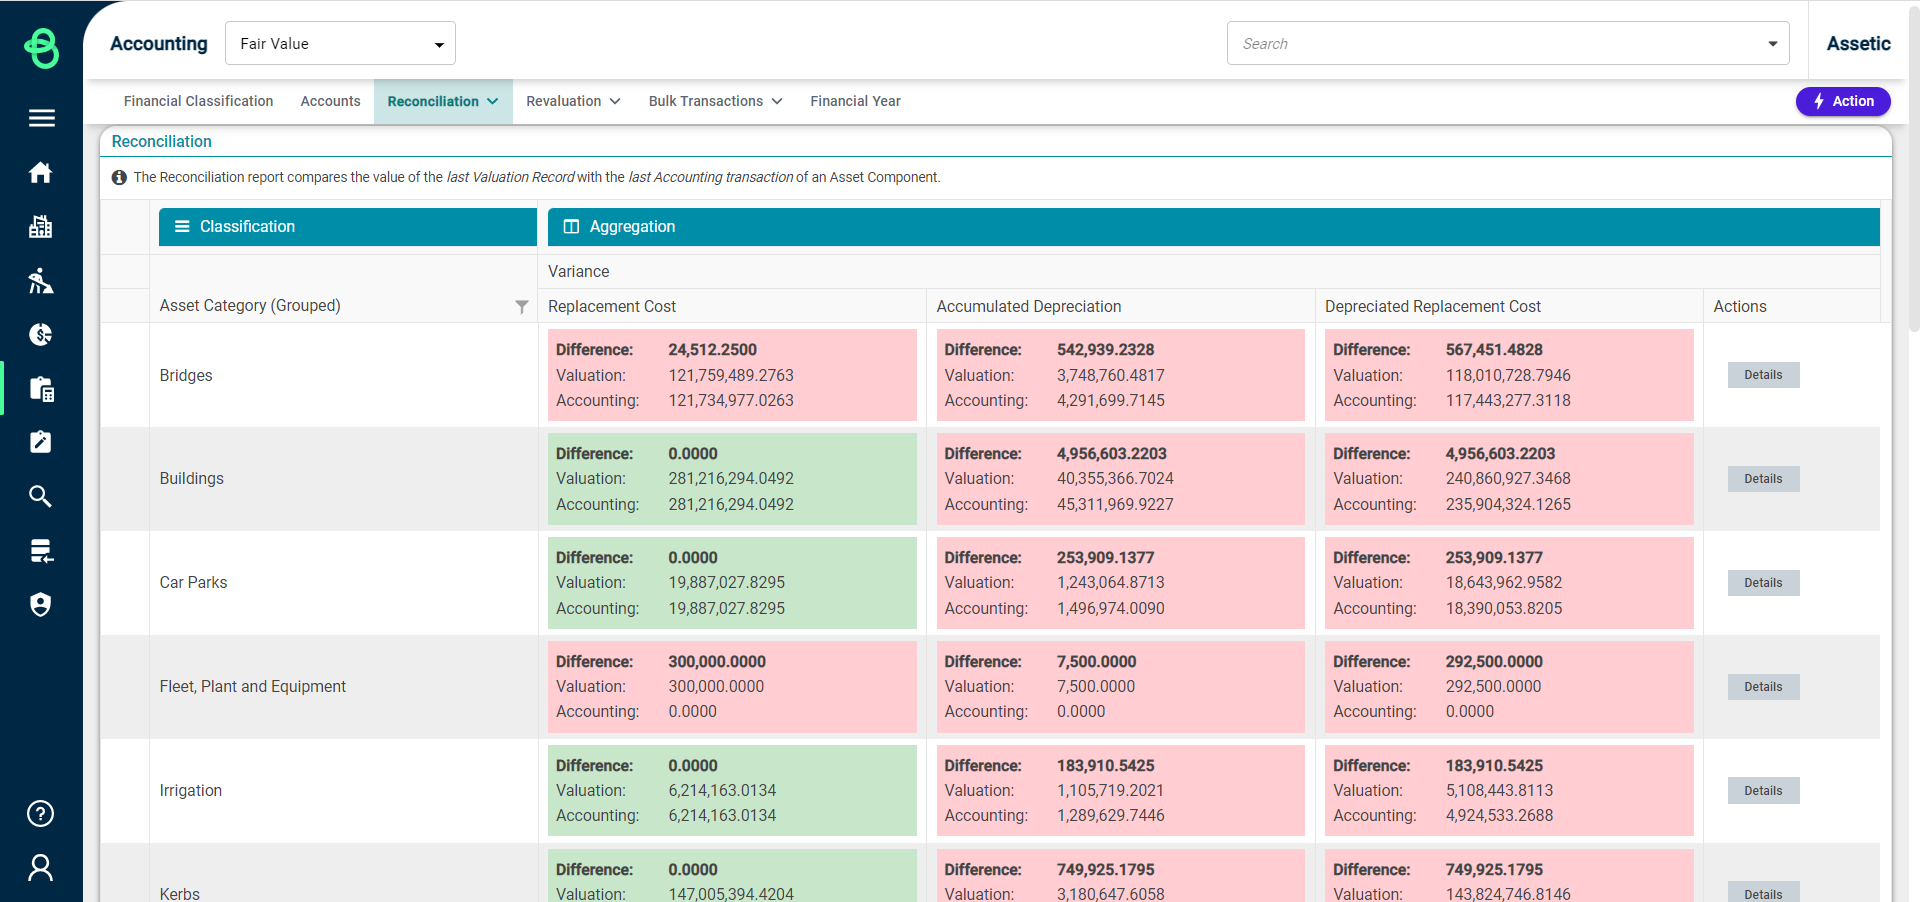
Then click the Reconciliation tab and select the Report.

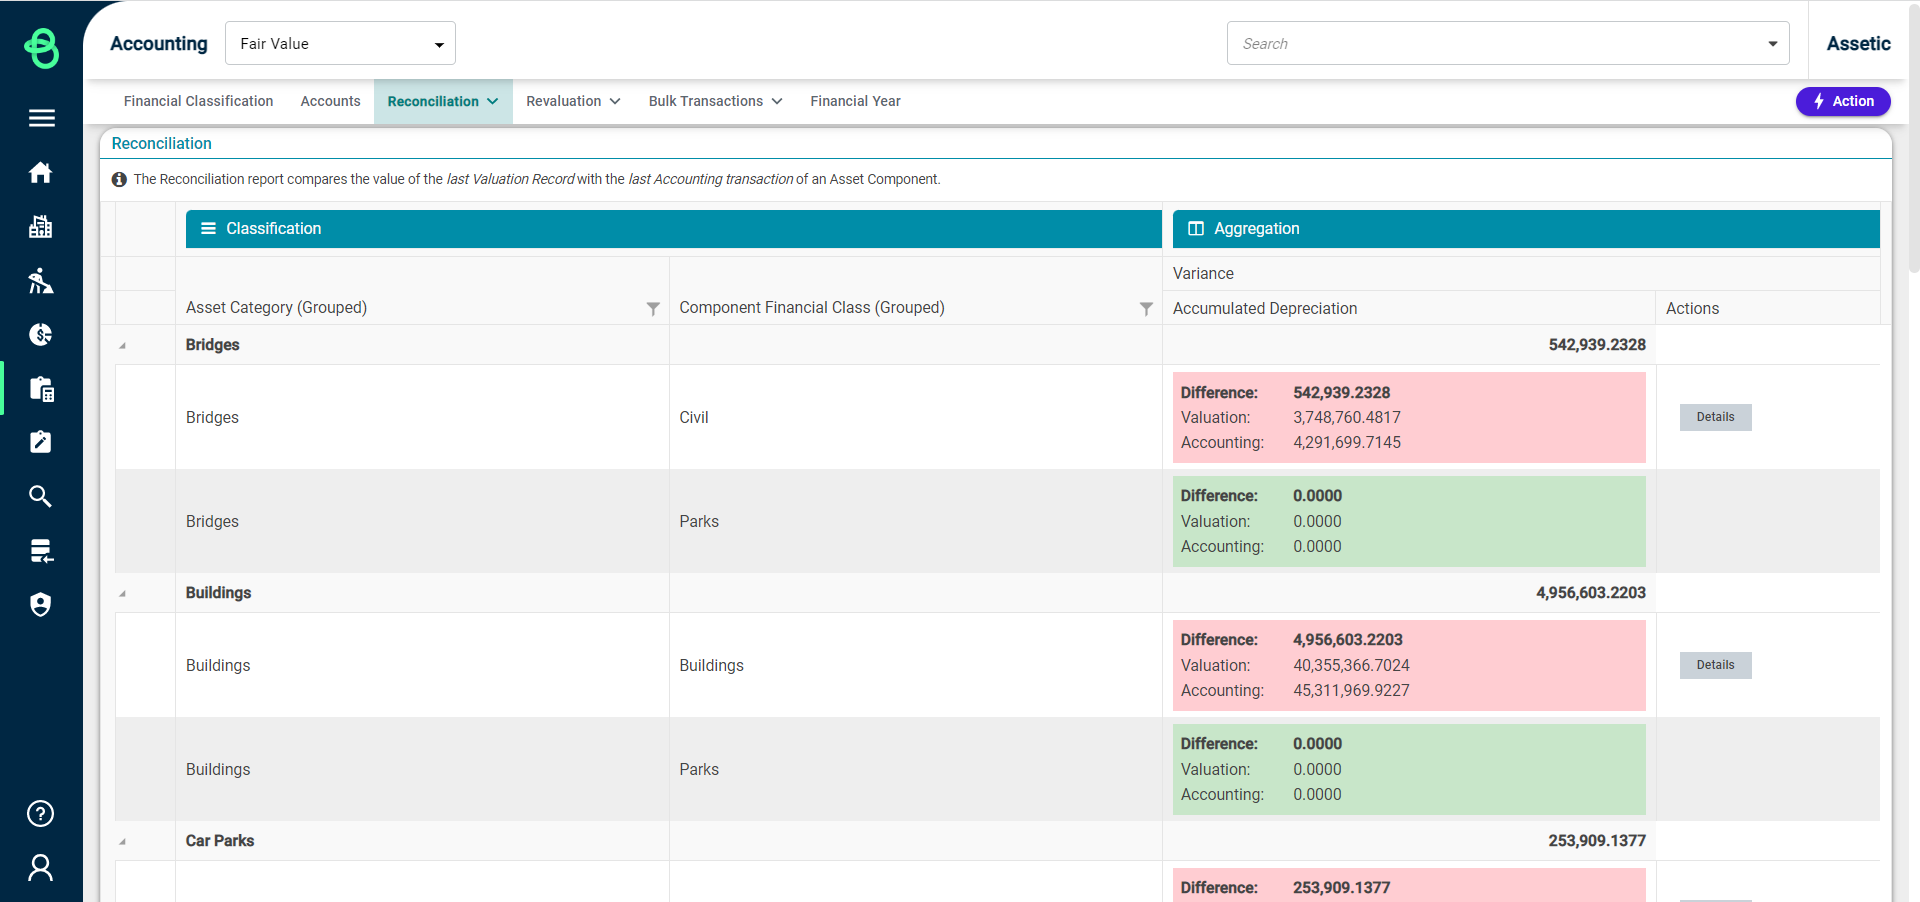
It will generate the following report as shown below:
To select multiple groupings, click on the icon within the Classification grid and the following window is displayed:
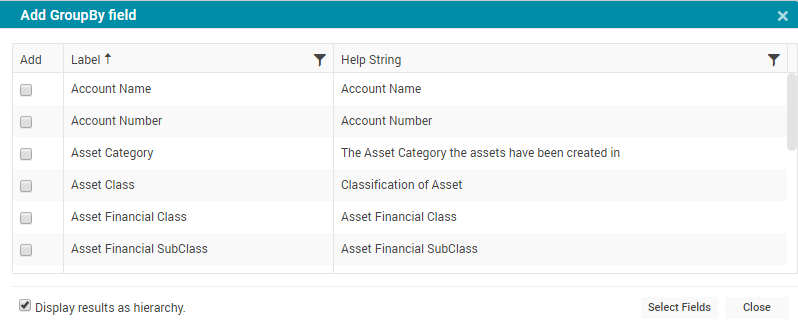
Users can select the required fields by clicking on the checkbox. Also, users can tick the 'Display results as hierarchy' checkbox to display the results grid as a hierarchy.
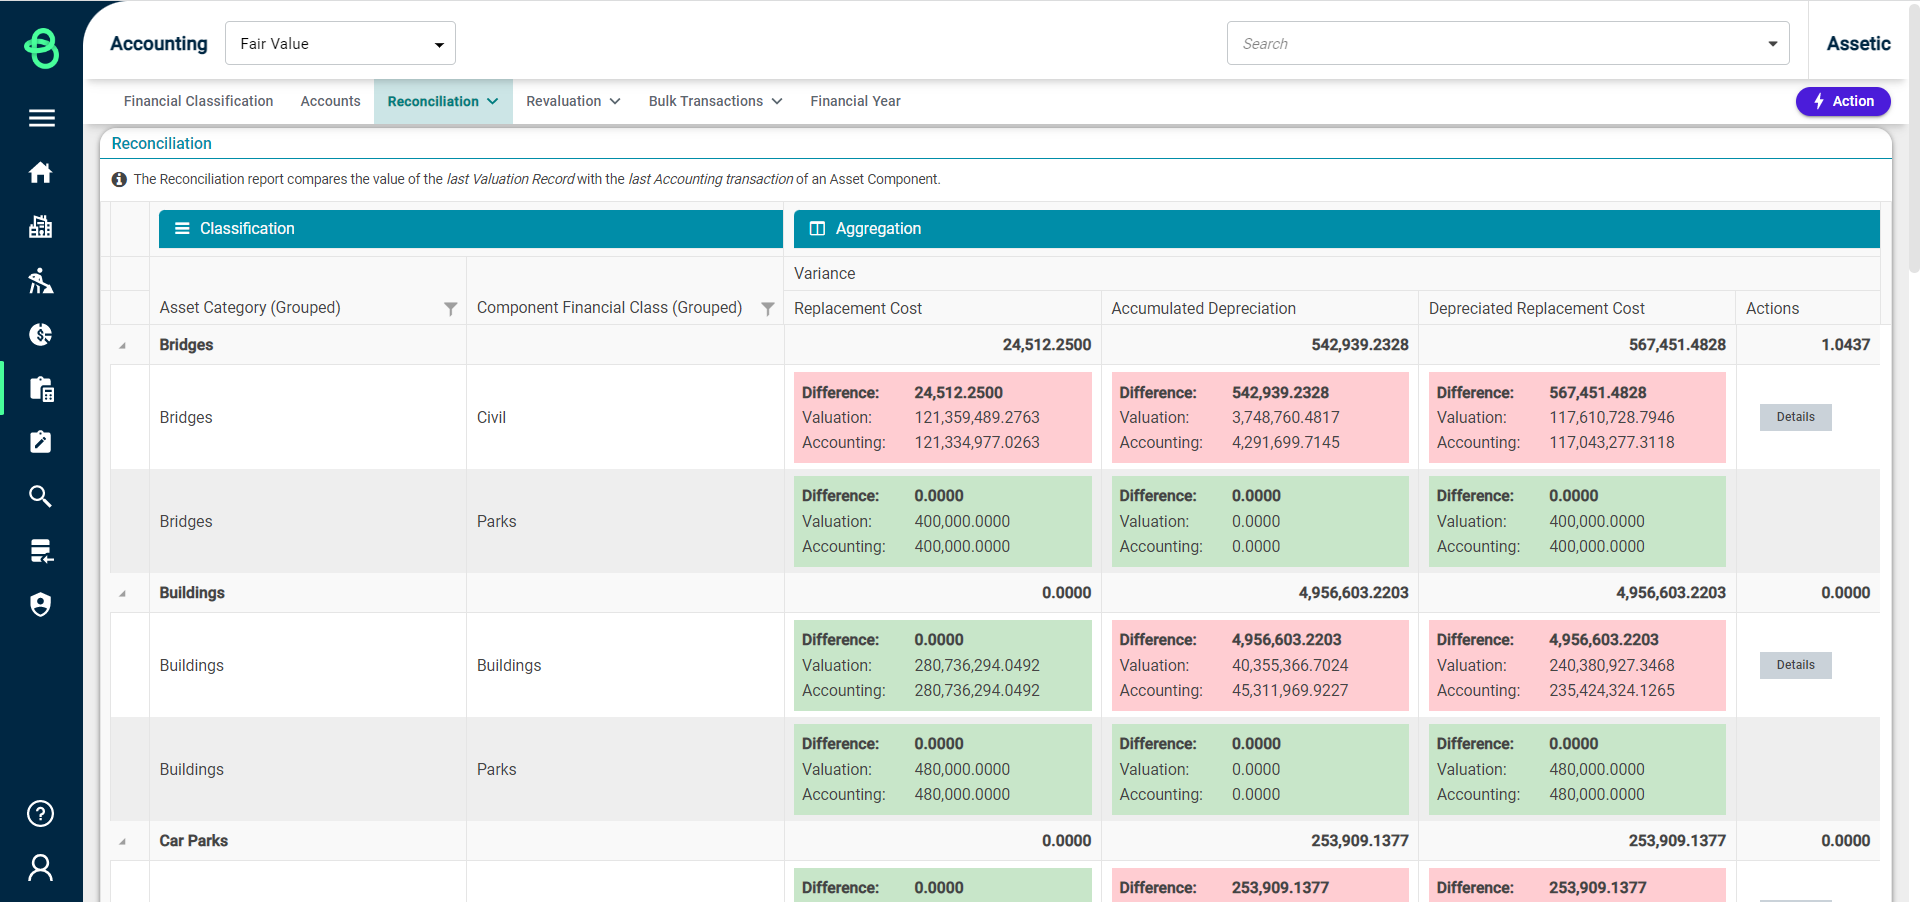
Once the required fields are selected, click on 'Select Fields' and this will generate a Reconciliation report grouped by the selected fields:
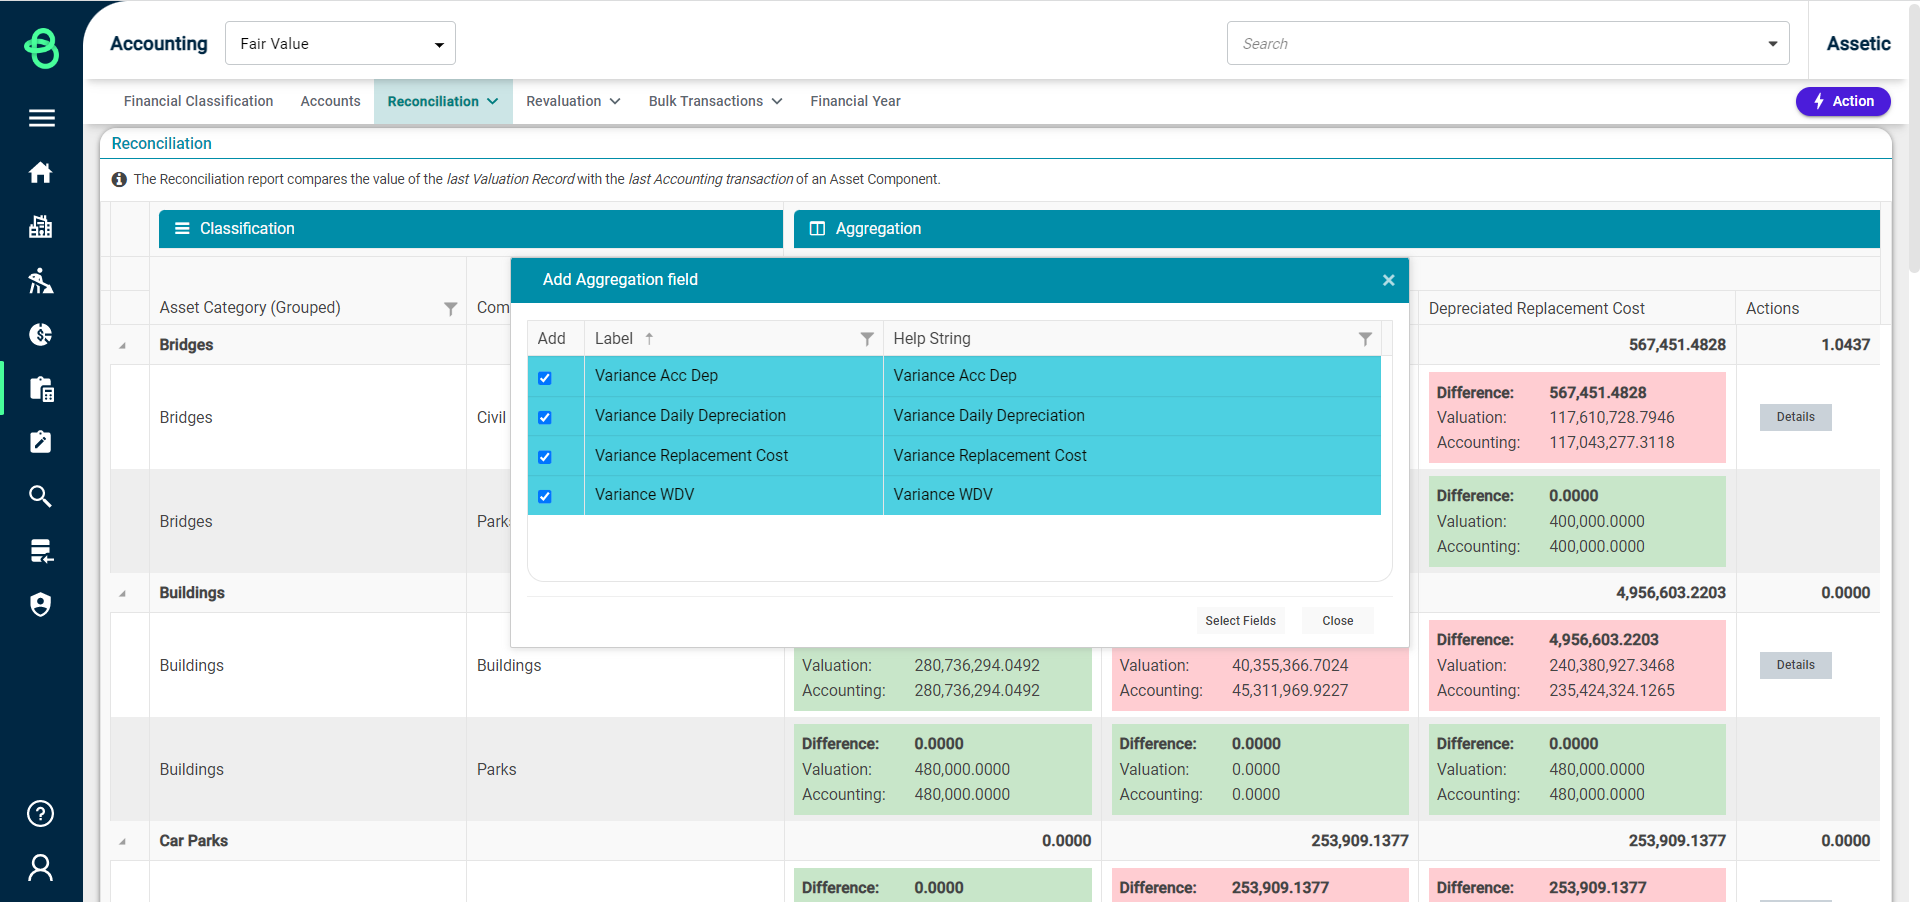
Click on the icon above the Aggregation grid and the following window is displayed with the available fields selected:

Users can uncheck the fields to exclude them from the Reconciliation report, and then click on 'Select Fields' button to modify the report.
Clicking on the icon displays the Column manager window:
Users can uncheck Columns and the report is displayed with only the selected columns:
Alternatively, the reconciliation report can also be generated in the Basic mode. While on the Reconciliation- Report page, there is a toggle button in the Actions menu to enable the Basic Mode:
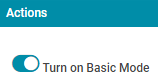
Turn on the Basic Mode to load the following screen:
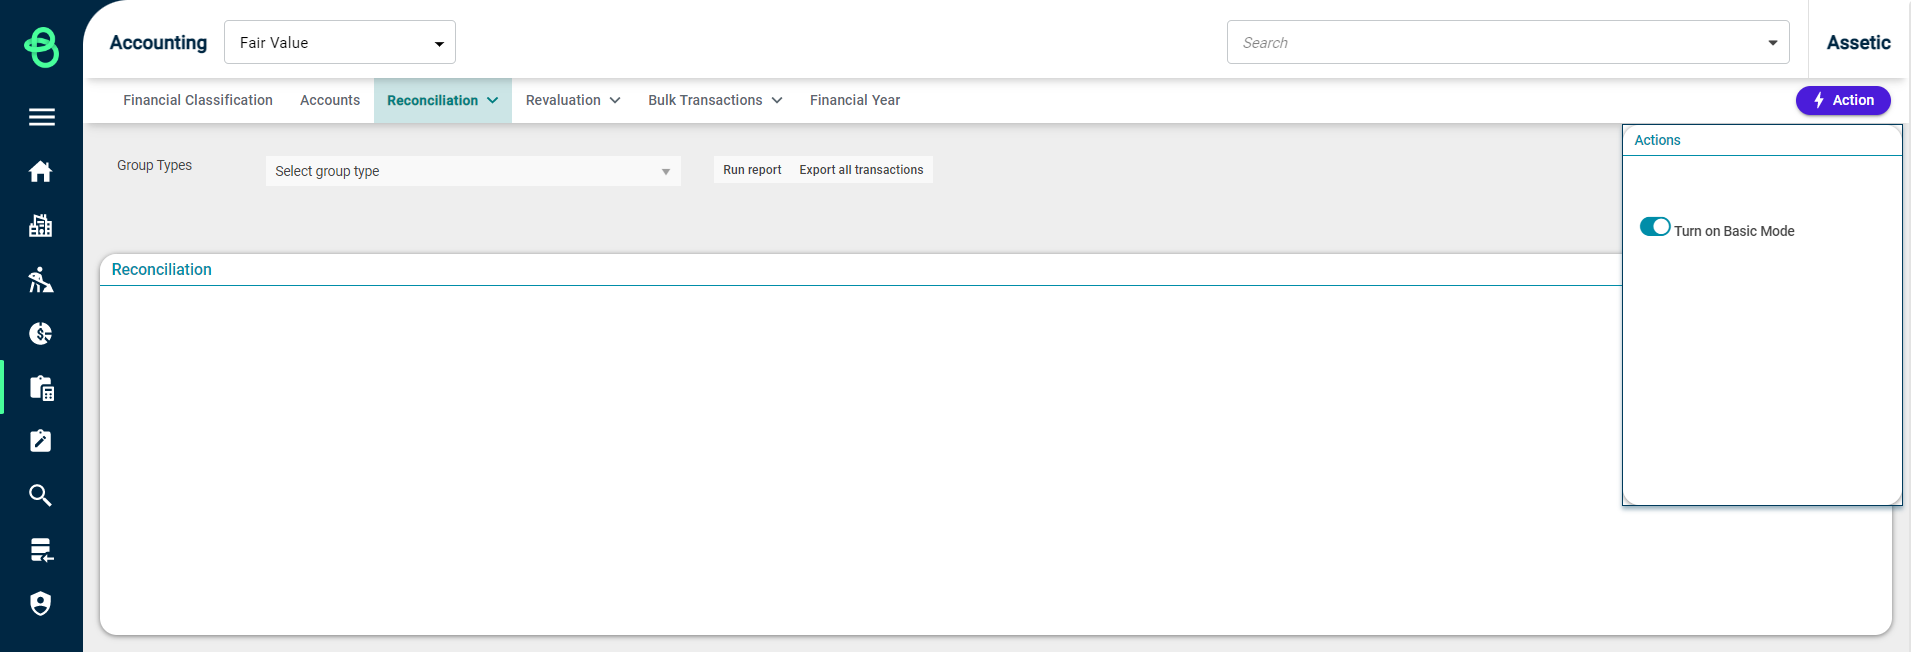
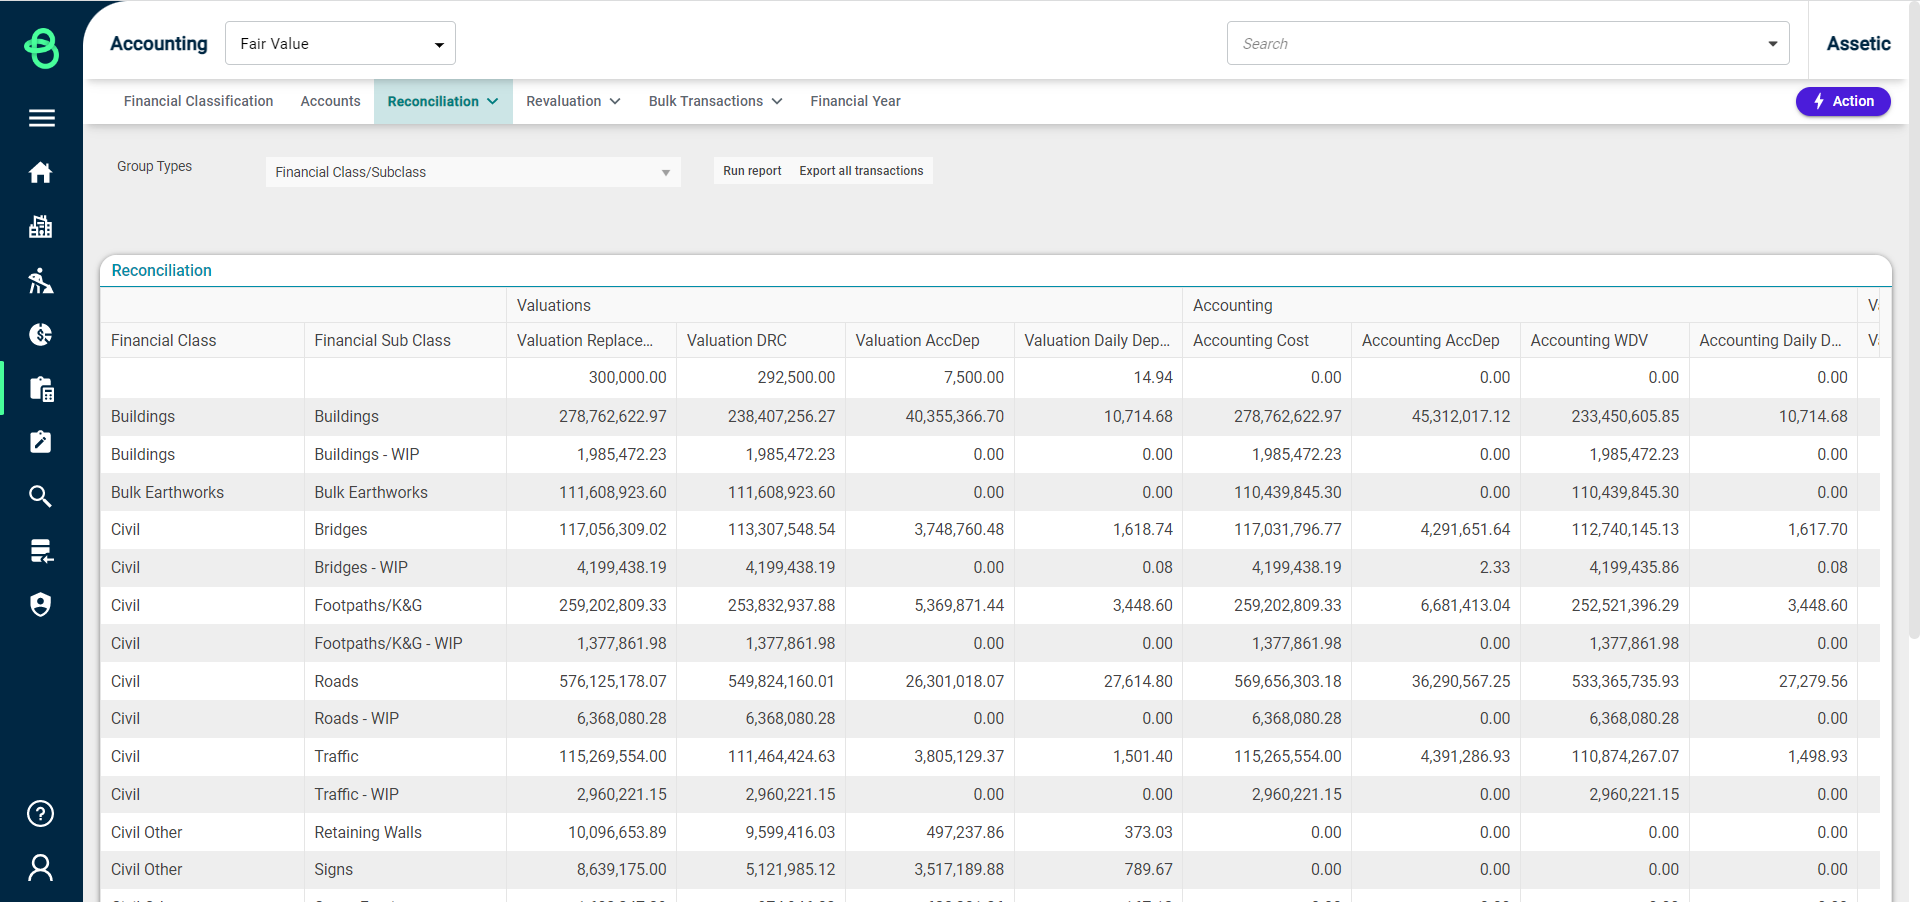
Select 'Financial Class/Subclass' from the 'Group Types' drop-down field and then click on 'Run Report'. This will generate the Reconciliation report as shown below:
To export the generated reconciliation report, click on 'Export All Transactions' button and the exported report is available to be downloaded from the Exported Reports drop-down within the Reconciliation tab.
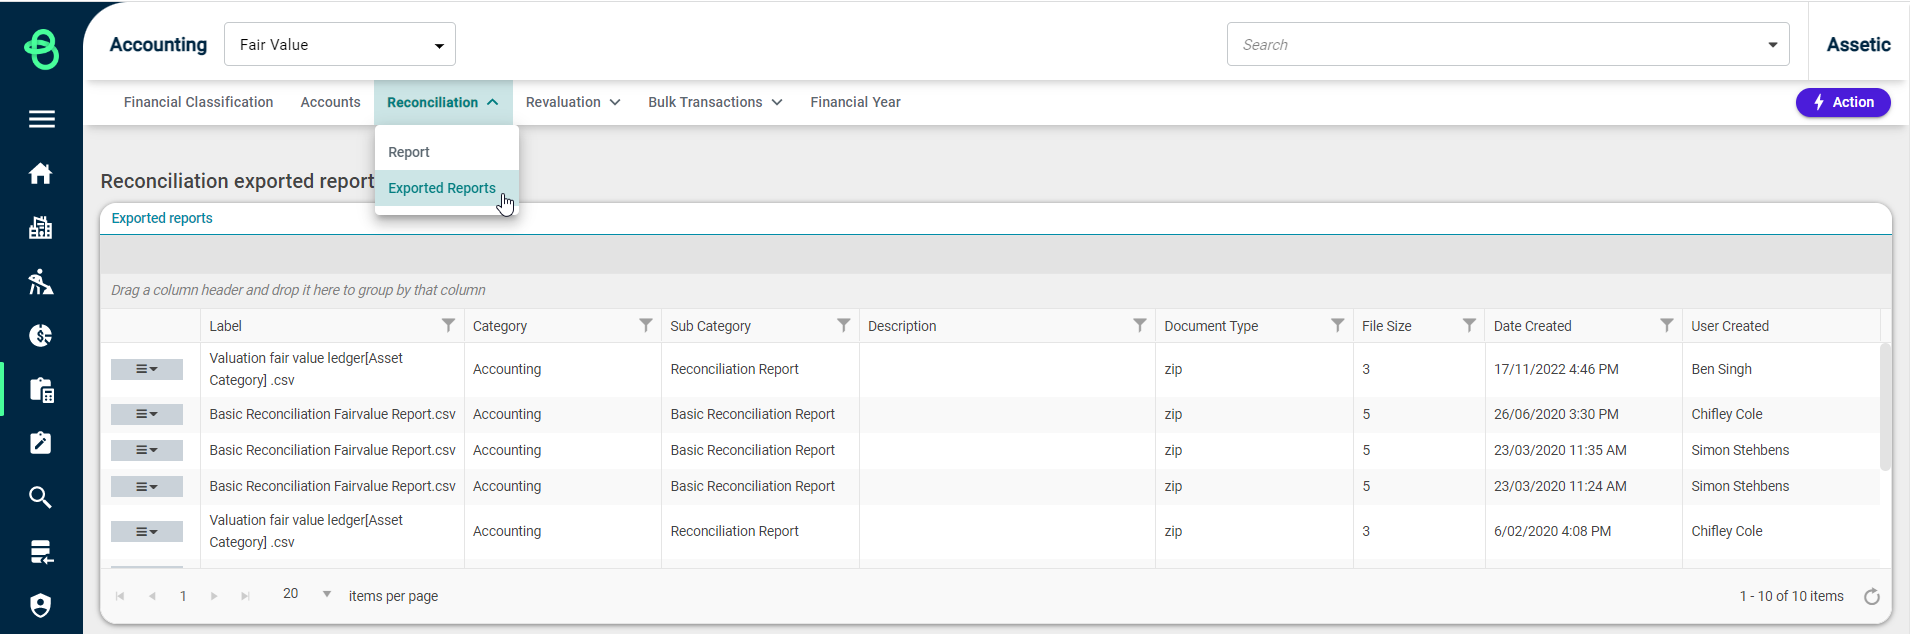
Click on the menu icon to download or delete the report:
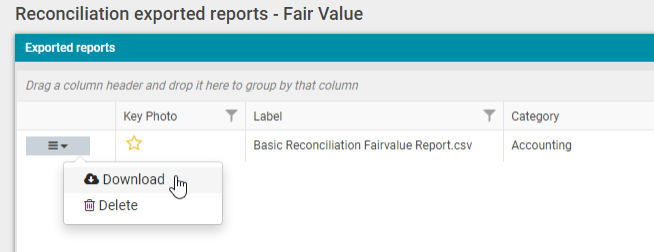
To open the exported report, click 'Download' and the report downloads locally in csv.gz format. Then open the local folder that the file was downloaded to, and locate the .gz file.
Next, right-click to select the Unzip tool and extract (Unzip) the file. The following window appears:
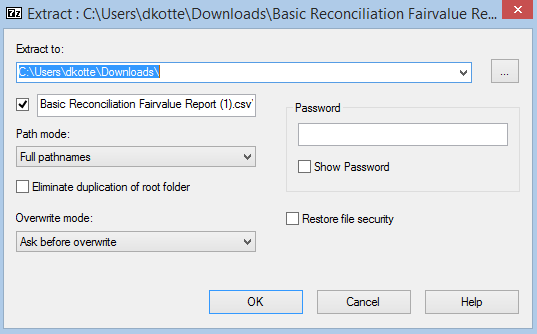
In 'Extract to' dialog, enter or browse to the folder path where the file is to be extracted to and select 'OK' to start the extraction. This will extract a .csv file in the folder that has been selected, with the same file name as the Zip file.
If this exported file is no longer needed, simply click on 'Delete' from the menu icon. A pop-up message is shown confirming the action.
